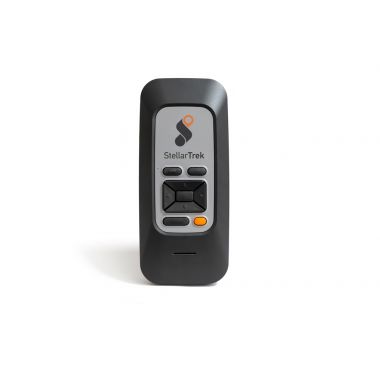
Trekker Breeze 1.2 upgrade

 Trekker Breeze

This document describes useful information regarding HumanWare's Trekker Breeze 1.2.0 GPS orientation aid.

Please refer to the What’s new section to consult a list of product highlights. Software update installation procedures are described in Section 2. Known limitations, workarounds, tips and other useful procedures are documented in Section 3.

1.   What's new in Trekker Breeze 1.2

Breeze version 1.2.0 includes the following features:

Extended search for Points of Interest

"What's around" function allows an initial search on the current road segment or within a range of 300 feet if user is in open area. A second search is possible in both situations. The user can select one of the ten following category groups. The search will announce the 50 closest POIs/landmarks within a distance of 5 miles (8 kilometers):

  • Landmarks
  • Transportation
  • Food
  • Banking
  • Health
  • Shopping
  • Lodging
  • Education
  • Automotive
  • All categories

Guidance to a selected Point of Interest

Once you select a Point of Interest or landmark from the list presented in the “What’s around” search, Breeze will provide turn instructions by simply pressing the Confirm key.

Advanced street positioning 

This new version of Breeze provides a superior travel experience and more accurate positioning:

  • Reduction in occurrences of mapping on lateral streets when crossing an intersection.
  • Better detection of very close intersections in pedestrian and motorized modes.
  • Faster street name announcement after turning on a lateral street.
  • Reduction of occurrences where Breeze cannot provide “backtrack” instructions.
  • Fixed invalid instructions in Routing and Backtrack in certain circumstances.
  • 3-way intersections are fully described even with identical names: "3 way intersection: Street A crossing Street A on your right".
  • More precise vocabulary to describe uncertain situations.
  • Off route indication when first intersection is missed.
More information when travelling in a vehicle

In motorized routing, Breeze automatically announces the next instruction and the distance to it after a manoeuvre at an intersection.  

Search for Points of Interest and turn instructions in motorized travelling are now allowed. 

Enhanced voice

The new generation Text-to-speech implemented in version 1.2 is clearer and louder. English speaking users can select a US or UK voice. Versions for both languages will be available for download from our web site.

Reset GPS Position

From “Settings”, it is now possible to reinitialize the GPS position when the reported position, like the street name, is invalid. It may be particularly useful in urban environments where tall buildings may interfere with the GPS signal.

Enhancements for United Kingdom users:

  • Improved U.K. dictionary (better pronunciation of street names)
  • From the “Settings” menu, it is now possible to select Distances in Miles and Yards

2.   Software update installation

To upgrade Trekker Breeze to a more recent version, you will need to acquire the installation upgrade file. This file is available on the Humanware website. The Installation upgrade file is an executable file with an .exe extension. A PC is required to perform the installation. You can use the Breeze SD Card (the card containing your geographical maps) or another SD Card to perform the installation. The selected card will be referred to as the Installation SD card later in the text.

To prepare the installation SD card, follow the instructions below:

  1. Insert the SD card in the computer's SD card reader. You may also use an external SD card reader connected to the computer's USB port.
  2. Download the installation upgrade file to the PC. Double-click the file.
  3. From the opened dialog box, select the proper SD card location from the list of those found on the computer and press OK.
  4. The Trekker Breeze upgrade program will be copied to the installation SD card. 

Once the installation SD card is ready, please follow this procedure:

  • Connect your Trekker Breeze device to a power outlet. Neglecting to do so may cause device memory corruption.
  • Remove the Trekker Breeze SD card if still present in the device. Turn on the device and wait for the "Please insert storage card" message.
  • Insert the installation SD card. After a few seconds, you should hear an installation welcome message.
  • A message will announce an automatic restart of the Breeze about one minute later.
  • After the restart, beeps will be played by the device at regular intervals for about two minutes. Wait for the installation success message.
  • If installation SD card is different from Trekker Breeze SD card, remove it and insert Trekker Breeze SD card.
  • Press the Reset button to restart Trekker Breeze.

Notes:

  • If Trekker Breeze SD card is used for installation purposes, all installation files will be deleted after pressing the Reset button at the end of the installation.
  • In case of problems during installation:
    • If the installation success message is not announced after a few minutes or if an installation failure message is heard instead, do not reset the device. Remove the installation SD card and insert it again. If the problem persists, contact technical support.

3.   Known limitations, workarounds and tips

The following list describes known limitations for Trekker Breeze 1.2.0. Its purpose is to help the user identify certain issues and proposes workarounds and troubleshooting procedures.

Connecting to GPS satellites:

First use of Trekker Breeze: when Trekker Breeze is used for the first time, the delay before connecting to GPS satellites will be longer than usual:

  • Turn on your device outside in an open sky area.
  • You may have to wait up to 20 minutes before Trekker Breeze can provide your current location.
  • Note that you may have to repeat this procedure if Trekker Breeze has been unused for more than a week and the battery was not on charge during that period.

Subsequent uses of Trekker Breeze: as soon as a first position has been found, it will be take less time to obtain your location at device power up:

  • GPS connection will be established most of the time within a few seconds up to 5 minutes.
  • If you have trouble establishing a GPS connection, make sure you are located in an open sky area.
  • Next, press the Reset button and wait for the Trekker Breeze to restart.
  • Ultimately, if resetting the device does not fix the problem, remove and insert the battery again and restart your Trekker Breeze.

Trekker Breeze does not start

When turning on your device, a distinctive tone should be heard. In case this does not happen, the Trekker Breeze software will not start:

  • Turn Trekker Breeze off and wait for about 5 seconds before turning on again.
  • If the preceding suggestion does not help, turn on the device and then press the Reset button. It will automatically start the Trekker Breeze.

Experiencing problems with the SD card

When turning on Trekker Breeze, you may hear a message asking you to "Please insert storage card".

If such is the case:

  • Remove and insert the SD card again
  • Press any button. If you still get the same message, turn off the device and turn it on again.
  • If the message is still announced, you may have a problem with the SD card. Please contact your distributor for replacement.

When turning on Trekker Breeze, you may hear message announcing "Cannot access map information".

If such is the case:

  • Turn off the device and turn it on again.
  • If the message is still heard, the geographical map may not be properly installed on your SD card. Please contact your distributor for map reinstallation or replacement.

Recording routes in a vehicle

Breeze was not designed to record routes in a vehicle. If Breeze detects that you are in a vehicle, it will not allow you to start the recording of such a route. If you start recording a route by walking on the street and later enter a vehicle, Breeze will continue the recording but the created route will not give you a useful navigation experience when selecting it later.

Navigating a route created in an open space

If you create a route that starts in an open space, you will find that when you select it after pressing the GOTO button, that the first instruction will be very limited. It will typically be something along the lines of “Please head north-east”. You may then press on the Right Arrow button to get the distance to the next instruction and from that point on, follow the navigation instructions.

Using Backtrack

As soon as Trekker Breeze is started, a new track log of your GPS positions is created to allow you to backtrack anytime. Please note that if you turn your device off during your journey, the preceding positions will be lost and you will not be able to retrace your steps.

You may experience difficulties following navigation instructions if you decide to backtrack from an open area, especially if you remained at the same location for a period of time. For instance, this would be the case if you entered a store and did not turn off your Trekker Breeze. The GPS coverage may be lost or become very inaccurate. In those circumstances, backtracking will propose a succession of instructions in a clockwise manner that may be difficult to follow. In such situations, the best way to continue to be guided is to come back to the street network and follow instructions as soon as you reach the first intersection. 

Guidance to a landmark

Breeze cannot provide instructions to guide you to a landmark in two situations:

  • You are on the street and the destination landmark is far from the street network (more than 100 meters or 300 feet), in an "open area" such as a park, parking lot, garden, etc.
  • Conversely, you are currently situated in an open area (more than 100 meters or 300 feet far from the street network) and wish to reach a landmark located on a street (grocery, house, etc).

Effective guidance relies on the quality of the positioning (point of origin and landmarks). Always make sure that street positions are not mapped in open areas, and that open areas are not mapped on the street network. Before recording landmarks, press the Where am I button to make sure that the Breeze has properly located your position. If the landmark is meant to be situated at an address, make sure the Breeze recognizes the location as a position on that Street (and not an open area). Similarly, if the intended landmark is meant to be in an open area, make sure Breeze does not recognize the location as being linked to streets.

Trekker Map Manager

The Map manager allows the transferring of maps, routes and landmarks to your Breeze device. Before installing the Trekker map manager software, you have to install ActiveSync or (Windows Mobile on Vista) on your computer.

To install Trekker Map Manager and ActiveSync, insert the Companion CD into your CD-ROM drive, select Trekker Map Manager and follow the onscreen instructions. Trekker Map Manager will be installed in the default location: C:\Program Files\Humanware\Trekker Map Manager (if Windows is installed on your C drive). If you wish to select another location, use the Browse button.

Please note that there are two ways to install a new map on the Breeze SD card using Trekker Map Manager: either you insert the SD card in a SD card reader on your PC or you connect your Breeze device with SD card inserted to your PC with the USB cable. The first method is faster. However, if you want to backup or restore your personal landmarks, you will need to connect your Breeze to your PC to perform the operation.

Installing a new map

  • Please contact Humanware to obtain the required maps on CD.
  • Install the Trekker Map Manager included on the Companion CD in your computer. Please note that ActiveSync (Windows XP) or equivalent under Vista is required in your PC in order to use the Map Manager.
  • There are two ways to install a new map on the Breeze SD card using Trekker Map Manager: either you insert the SD card in a SD card reader on your PC or you connect your Breeze device with SD card inserted to your PC with the USB cable. The first method is faster.
  • To use the first method, remove the Trekker Breeze SD card from the Breeze device and insert it in your PC SD slot or SD USB reader connected to your PC.
  • In the Trekker Map Manager, browse to find the map location. Then select SD card to transfer the map. Please consult the Map manager User's Guide or Help section for further details on the installation procedure.
  • Once maps are transferred to the SD card, replace the card into the Breeze device.

Trekker Breeze automatically handles all maps present on the SD card up to a limit of 4. If more than 4 maps have been installed on the SD card, Trekker Breeze will activate the 4 first maps in alphabetical order.

Landmarks backup

You can backup your landmarks on your PC. Please follow these steps:

  • Install the Trekker Map Manager included in the Companion CD on your computer. Please note that ActiveSync (Windows XP) or equivalent under Vista is required on your PC.
  • Verify that the SD card is inserted in your Breeze. Connect the Breeze device to your computer through the USB synchronization cable provided with the package.
  • Establish an ActiveSync partnership
  • In the Map Manager tool, select the Landmark tab and follow the instructions described in the Map Manager User Guide or in the Map Manager Help section.


Download now version 1.2 with Samatha voice (US)

Download now version 1.2 with Daniel voice (UK)

Download Version 1.2 Release Notes